Thursday, November 7, 2024
How to design and build your ideal 8x12 shed on a budget

Alright, so you’re finally ready to build that shed you’ve been dreaming of. You’ve got visions of a cozy workshop, a haven for gardening supplies, or maybe even a tiny home office. But the price tags on pre-built sheds can make your wallet whimper. Don’t despair! Building your own 8x12 shed can be a fun and rewarding project, and you can do it on a budget.
Let’s Get Planning!
Before you even think about buying lumber, take some time to plan. This is crucial, trust me. It'll save you headaches down the road.
1. Location, Location, Location:
First things first, where’s your shed going to live? You need to consider:
Sunlight: Do you want a sunny spot for your plants or a shaded retreat?
Accessibility: Will you need to drive a car or truck near the shed?
Drainage: Make sure your shed is on level ground and away from any potential flooding zones.
Local Building Codes: Don't forget to check with your local building department for any regulations or permits you might need.
2. The Design:
Now for the fun part! You can design a shed that perfectly suits your needs. Here’s a breakdown:
Foundation: Choose a foundation type that fits your budget and the soil conditions. You can go with concrete blocks, gravel, or even just pressure-treated lumber.
Walls: Think about what type of wood you want to use. Pine is affordable and easy to work with. If you want a more robust shed, consider using pressure-treated lumber for the bottom plates and bottom rows of siding.
Roof: You can choose between a gable roof (the classic A-frame) or a shed roof (flatter slope). A gable roof will give you more headroom, but a shed roof is easier to build.
Doors and Windows: Think about the size and placement of doors and windows. How big does the door need to be for your equipment or tools? Do you want natural light in your shed?
Flooring: Consider your needs. A simple plywood floor is a budget-friendly option. You can upgrade to composite decking or concrete if you want a more durable and low-maintenance floor.
3. Budget Breakdown:
Now, let's get real. It's time to think about your budget and how much you’re willing to spend. Here’s a rough breakdown:
Materials: This will be the biggest chunk of your budget. Lumber, plywood, roofing shingles, windows, doors, and hardware all add up. Do some research and shop around for the best deals. Don't be afraid to ask for discounts or look for used materials.
Tools: You might need to invest in some basic tools like a circular saw, drill, hammer, and measuring tape. If you don't already have them, look for deals at garage sales, thrift stores, or online.
Labor: If you're doing the work yourself, you'll save on labor costs. But if you need help, factor in the cost of hiring someone.
Time to Build!
With your plan and budget in place, it's time to start building!
Step 1: Foundation:
Preparing the site: Clear the area of any debris, and level the ground.
Foundation options:
Concrete blocks: A simple and affordable option, but you’ll need to be sure the ground is level.
Gravel base: Spread a layer of gravel and compact it to create a firm base.
Pressure-treated lumber: Use 4x4 posts and beams to create a raised foundation.
Leveling: Double-check that your foundation is level before proceeding to the next step.
Step 2: Framing:
Measure and cut: Use your measurements to cut the lumber for your walls and roof.
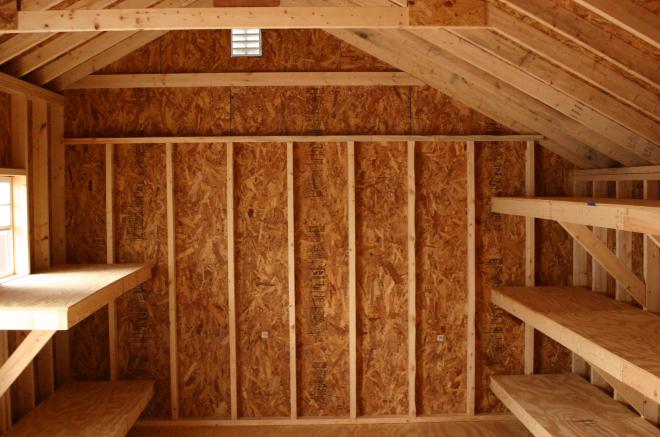
Building the walls: Assemble the wall frames using 2x4s and nails or screws.
Building the roof: Create the roof frame and attach it to the walls.
Sheathing: Attach plywood sheathing to the exterior walls and roof for stability.
Step 3: Roofing:
Underlayment: Install a layer of roofing felt over the plywood sheathing to prevent leaks.
Shingles: Apply the shingles according to the manufacturer's instructions.
Flashing: Install flashing around the chimney, vents, and other areas to prevent leaks.
Step 4: Siding:
Siding options: Choose from a variety of siding materials like wood, vinyl, or composite.
Installation: Install the siding according to the manufacturer's instructions.
Step 5: Doors and Windows:
Framing: Cut and install the rough openings for your doors and windows.
Installation: Install the doors and windows, making sure they are level and secure.
Step 6: Flooring:
Subfloor: Lay down plywood subfloor for a solid base.
Finish flooring: Install your chosen flooring, whether it's plywood, composite decking, or concrete.
Step 7: Finishing Touches:
Painting or staining: Paint or stain the exterior and interior of your shed to protect it from the elements and give it a personalized look.
Insulation: Add insulation to your walls and roof if you plan on using the shed in colder weather.
Electrical: If you plan to run electricity to your shed, have a qualified electrician install it.
Building Your Dream Shed:
Building your own shed is a challenging but rewarding project. With careful planning, a little elbow grease, and the right tools, you can create a space that perfectly suits your needs and your budget. Just remember to take your time, be patient, and enjoy the process!
Remember: Always prioritize safety when working with power tools and follow the manufacturer's instructions for all materials.
Here are some extra tips to help you stay on budget:
Shop around: Compare prices at different lumberyards and home improvement stores.
Look for sales: Keep an eye out for sales and clearance items.
Consider using recycled materials: You can often find used lumber and other building materials at a fraction of the cost.
Don’t be afraid to ask for help: If you’re not comfortable with certain tasks, ask a friend or family member for help.
Good luck with your shed project!
No comments:
Post a Comment
Note: Only a member of this blog may post a comment.