Thursday, November 7, 2024
A comprehensive diy plan for building a 10x12 garden shed
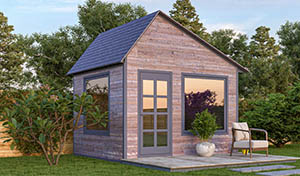
Alright, so you're thinking about building a garden shed. Great idea! They're super handy for storing tools, bikes, garden supplies, or even just getting some extra space out of your backyard. A 10x12 shed is a good size - big enough to be useful, but not too big to overwhelm your yard.
Let's get this project rolling! I'll walk you through the whole process, step-by-step, and by the end, you'll be ready to build your very own shed.
Before You Even Think About Picking Up a Hammer
First things first, let's talk about the essentials.
Planning Permission: Check with your local building department. In some areas, you'll need a permit to build a shed. This varies depending on size, location, and local regulations.
Location, Location, Location: Choose a spot that’s level, with good drainage. Think about sunlight, access, and proximity to your house.
Design & Budget: Decide on your shed's style and features. Will it have windows, a door, a loft? Consider your budget and prioritize the features that are most important to you.
Materials: You can use treated lumber for the foundation, floor, walls, and roof. Think about using pressure-treated wood for the base and floor to avoid rot.
Tools: You’ll need a basic set of tools including a hammer, saw, tape measure, level, drill, and screwdriver.
Laying the Foundation:
Now, let's talk about the foundation. This is the base of your shed, so you want it to be strong and stable. Here's how to do it:
1. Clear the Area: Remove any grass, rocks, or debris from the area you’ve chosen for your shed.
2. Mark Your Boundaries: Use stakes and string to mark the dimensions of your shed.
3. Level the Ground: Make sure the area is level using a level and shovel. You want the ground to be perfectly flat for a strong and even foundation.
4. Create a Gravel Base: Spread a 4-6 inch layer of gravel within the boundaries you marked. This provides drainage and prevents your shed from sinking into the ground. Compact the gravel with a tamper or a heavy object.
5. Install Pressure-Treated Skirts: Place pressure-treated 2x6 boards around the perimeter of the gravel, creating a frame for your floor. Secure these boards to the ground using concrete anchors or construction adhesive.
Building the Floor:
Now, let's build the floor. This part's pretty straightforward.
1. Cut Your Floor Joists: Cut your 2x10 floor joists to the length of your shed (12 feet).
2. Install Floor Joists: Place the joists across the width of your shed, spaced 16 inches apart. Support the joists with your pressure-treated skirt boards. Use construction screws to secure the joists.
3. Add Cross Bracing: Install diagonal cross bracing between the floor joists for added strength.
4. Lay Your Subfloor: Cut sheets of plywood to fit your shed's dimensions. Lay the plywood sheets on top of the floor joists. Secure them with screws.
Building the Walls:
Alright, time to put up the walls! This is where your shed starts to take shape.
1. Cut Your Wall Studs: Cut your 2x4 wall studs to the height of your shed (which will likely be 8 feet). You'll need to cut your studs to create the openings for your door and any windows.
2. Build Wall Frames: Construct the wall frames by joining the studs together using construction screws.
3. Install the Walls: Erect the wall frames on the floor and secure them to the floor using screws.
4. Add Sheathing: Cover the exterior of the walls with plywood or OSB sheathing. This creates a solid surface for your siding.
5. Install Doors & Windows: Cut openings for your door and windows using a saw. Install the doors and windows.
Building the Roof:
We're getting close! Let's get that roof on.
1. Build Roof Trusses: Construct your roof trusses using 2x4 lumber. You'll need to design these trusses based on the span of your shed.
2. Install the Roof Trusses: Place the roof trusses on top of the walls and secure them using screws.
3. Sheathe the Roof: Cover the roof trusses with plywood or OSB sheathing.
4. Install Roofing Material: Install your roofing material. This could be shingles, metal roofing, or other options depending on your preference.
The Finishing Touches:
Now comes the fun part: making your shed look fantastic.
1. Add Siding: Install siding on the exterior of your shed. This could be wood, vinyl, or even metal.
2. Paint or Stain: Give your shed a fresh coat of paint or stain to protect the wood and enhance its appearance.
3. Install Trim: Add trim around the edges of the shed, around the windows, and around the door.
4. Install Gutters: If you want to collect rainwater, install gutters and downspouts.
5. Add Interior Finishes: You can add interior finishes, such as drywall or paneling, to make the inside of your shed look nice.
And That's It!
Congratulations! You’ve built yourself a beautiful and useful garden shed. Remember to regularly maintain your shed to keep it in good condition. Check the wood for rot, and repaint or restain as needed.
Building a shed is a great project for any DIY enthusiast, and it's a perfect way to add value and functionality to your backyard. Have fun with it!
No comments:
Post a Comment
Note: Only a member of this blog may post a comment.