Thursday, November 7, 2024
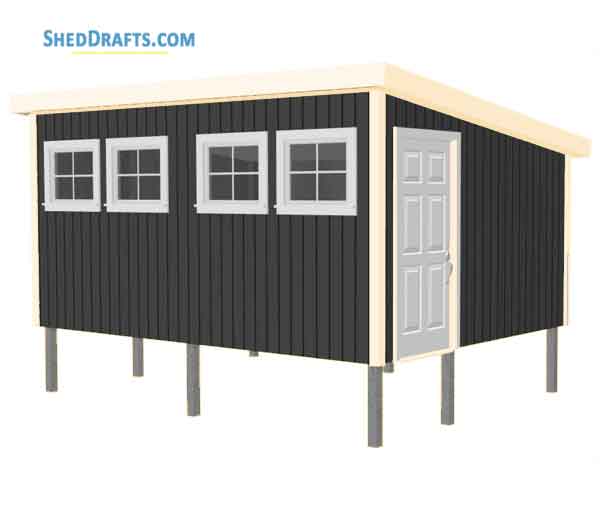
Constructing a lean-to shed for compact storage

Hey there, fellow storage-challenged folks! You know the feeling: you've got stuff piling up, and your garage is bursting at the seams. That's where a lean-to shed comes in, a simple and practical solution to your storage woes.
Think of it as a little house for your stuff, attached to your existing structure - your garage, fence, or even your house! It's perfect for storing garden tools, bikes, lawn mowers, or even your extra furniture. Best of all, it's surprisingly easy to build, even if you're not a seasoned DIYer.
So, let's dive in and tackle this project together!
Step 1: Planning and Design
The first step is to decide where your lean-to will live and what you want it to hold.
Location, Location, Location: Choose a spot that's easily accessible and receives good drainage. You want it to be close to the area where you'll be using the stored items, and you don't want it to be in a low spot that will pool water.
Size Matters: Measure the space you have available and figure out the dimensions of your lean-to. A 6x8-foot shed is a good size for storing smaller items, while a 10x12-foot shed can hold larger equipment.
Foundation Options: For a lean-to shed, you have several options for the foundation. A simple concrete slab is a solid choice, but if you're on a budget, you can use pressure-treated lumber to create a frame and then fill it with gravel.
Roof Style: Lean-to roofs are typically simple, with a single slope. You can choose from materials like asphalt shingles, metal roofing, or even corrugated plastic sheets.
Door Style: Think about how you'll access your shed. A single door is usually sufficient, but you could add a double door if you anticipate needing to move large items in and out.
Step 2: Gather Your Materials
Now that you've got your design figured out, it's time to gather your materials. Here's a basic list:
Pressure-treated lumber for the frame (4x4 posts for the foundation, 2x4s or 2x6s for the walls and roof)
Plywood or OSB for the walls and roof sheathing
Roofing materials of your choice (shingles, metal, etc.)
Building wrap or house wrap (for waterproofing)
Exterior siding (optional)
Door (single or double, depending on your needs)
Hardware: nails, screws, hinges, door handle, etc.
Concrete mix or gravel (for foundation)
Level, measuring tape, saw, hammer, drill, safety glasses, and gloves
Step 3: Building the Foundation
It's time to start constructing the foundation for your lean-to.
Clear the Area: Remove any vegetation, rocks, or debris from the site.
Set the Posts: Use a level and plumb bob to ensure that your posts are perfectly vertical. Secure them to the ground using concrete, gravel, or metal brackets.
Build the Frame: Using pressure-treated lumber, construct a frame for your lean-to, connecting the posts at the top and bottom. Make sure the frame is level and square.
Step 4: Framing the Walls and Roof
Next, it's time to frame the walls and roof.
Wall Framing: Cut and attach wall studs to the foundation frame, keeping them spaced 16 inches apart.
Roof Framing: Construct the roof rafters by cutting and attaching them to the wall studs. Be sure to check the angle of the roof to make sure it slopes correctly.
Sheathing: Once the framing is complete, install plywood or OSB sheathing over the walls and roof. This will create a solid surface for your siding and roofing materials.
Building Wrap: After you've attached the sheathing, apply building wrap to the walls and roof to prevent moisture damage.
Step 5: Installing Siding, Roofing, and the Door
Now it's time to add the finishing touches to your lean-to.
Siding: If you've chosen to add siding, attach it to the walls over the building wrap.
Roofing: Install your chosen roofing material, following the manufacturer's instructions.
Door Installation: Hang your door on the hinges and secure the handle.
Step 6: Finishing Touches
Painting or Staining: Once the construction is complete, paint or stain the exterior of your lean-to to protect it from the elements and give it a nice look.
Lighting: Add a light fixture inside the shed for easy access and visibility.
Flooring: Consider adding a floor to your lean-to, which can make it more comfortable and easier to clean. Options include concrete, wood, or even gravel.
Shelving and Storage: Now comes the fun part! Add shelves, hooks, and storage containers to organize your belongings.
Important Considerations:
Permits: Check with your local building department to see if you need a permit to build a shed.
Safety First: Always wear safety glasses and gloves when working with power tools, and be sure to lift heavy items safely.
Enjoy the Process: Building a lean-to shed is a rewarding project. Take your time, enjoy the process, and don't be afraid to ask for help if you need it.
And there you have it! Your very own lean-to shed, ready to tame your storage chaos and bring a bit of organization to your backyard. Now, go forth and build!
No comments:
Post a Comment
Note: Only a member of this blog may post a comment.