Monday, November 11, 2024
How to Design and Build a Custom Pole Barn

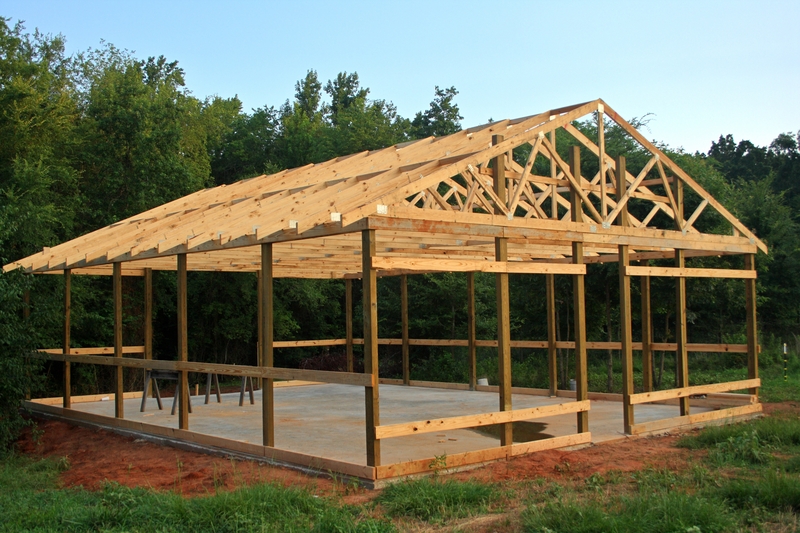
A pole barn, also known as a post-frame building, offers a versatile and cost-effective solution for a wide range of applications, from agricultural storage to workshops and garages. Their simplicity of construction and durability make them a popular choice for homeowners and businesses alike. However, building a custom pole barn requires careful planning and consideration of various factors to ensure a successful outcome. This comprehensive guide will walk you through the process, from initial design to construction completion.
Phase 1: Design and Planning
1. Defining the Purpose and Function:
- Determine the primary use of the pole barn. Will it be used for storage, workshops, livestock housing, or a combination of uses?
- Consider the specific requirements for each function, such as:
- Storage space: Calculate the square footage needed for equipment, vehicles, or hay.
- Workshop space: Factor in bench space, tool storage, and potential for machinery.
- Livestock housing: Plan for adequate space, ventilation, and animal-specific features.
- Outline the dimensions, layout, and any special features desired.
2. Site Selection and Assessment:
- Choose a suitable location that meets zoning requirements and offers access to utilities.
- Assess the soil conditions to determine the best foundation options.
- Evaluate the surrounding terrain and potential environmental impact.
- Consider the presence of trees, utilities, and potential drainage issues.
3. Design and Engineering Considerations:
- Structural Design: Consult with a qualified engineer or architect to ensure the pole barn meets local building codes and safety standards. Consider the following factors:
- Snow load: Determine the maximum expected snow accumulation.
- Wind load: Consider the wind speed and direction in your area.
- Roof type and pitch: Select a roof that suits your climate and aesthetic preferences.
- Pole size and spacing: Ensure adequate strength and stability based on the intended use.
- Framing and bracing: Incorporate appropriate structural elements for load distribution.
- Foundation Design: Choose a foundation that suits the soil conditions and building load. Options include:
- Concrete piers: Cost-effective for stable soil.
- Concrete slabs: Provide a solid floor and are suitable for heavy equipment.
- Gravel pads: Simple and economical, but may require more maintenance.
- Building Envelope: Select appropriate materials for the walls and roof, taking into account insulation needs, durability, and aesthetics.
4. Building Permits and Approvals:
- Contact your local building department to obtain necessary permits and inspections.
- Submit plans and specifications for approval, ensuring compliance with local codes.
- Coordinate inspections throughout the construction process to ensure adherence to standards.
Phase 2: Construction
1. Site Preparation:
- Clear the construction site of trees, debris, and existing structures.
- Grade the land to ensure proper drainage and level the building area.
- Install utilities, including water, sewer, and electricity, as needed.
2. Foundation Construction:
- Pour concrete piers or slabs according to the approved plans.
- Allow sufficient curing time for concrete to reach full strength before proceeding.
3. Pole Installation:
- Set the poles in the foundation, ensuring they are plumb and level.
- Anchor the poles securely to the foundation using concrete or anchor bolts.
- Consider using pressure-treated wood or steel poles for longevity and resistance to decay.
4. Roof Construction:
- Install the roof trusses, rafters, and purlins based on the design specifications.
- Sheath the roof with plywood or OSB, ensuring proper ventilation for air circulation.
- Install the roofing material, considering the climate, aesthetics, and budget.
5. Wall Construction:
- Install the wall studs or panels according to the design.
- Install insulation if desired, ensuring proper vapor barrier placement.
- Cover the walls with siding, considering factors such as maintenance requirements and aesthetics.
6. Finishing Touches:
- Install windows and doors according to the design and specifications.
- Install the interior and exterior trim, ensuring proper weather sealing.
- Install any desired finishes, such as flooring, lighting, and ceiling materials.
Phase 3: Final Inspections and Completion:
- Ensure all construction work adheres to building codes and safety standards.
- Obtain final inspections from the building department to ensure compliance.
- Conduct a thorough walkthrough to identify and address any issues or deficiencies.
Key Considerations for a Successful Pole Barn Build:
- Budget: Establish a realistic budget and factor in costs for labor, materials, permits, and inspections.
- Timeline: Set a realistic timeline for each phase of construction and allow for potential delays.
- Labor: Determine the level of DIY expertise and consider hiring professional contractors for specialized tasks.
- Communication: Maintain open communication with all involved parties, including contractors, suppliers, and inspectors.
- Flexibility: Be prepared to adjust plans as needed based on site conditions, material availability, or code changes.
Conclusion:
Building a custom pole barn is a rewarding endeavor that can provide a versatile and durable structure for various purposes. With careful planning, design considerations, and adherence to building codes, you can create a space that meets your specific needs and enhances the functionality of your property. Remember to consult with qualified professionals for structural engineering, foundation design, and building permits. Through diligent effort and attention to detail, your custom pole barn will be a testament to your vision and a valuable asset for years to come.
No comments:
Post a Comment
Note: Only a member of this blog may post a comment.