Thursday, November 21, 2024
Step-by-Step Lean-To Shed DIY: Build a Sturdy Shed for Your Tools

Step-by-Step Lean-To Shed DIY: Build a Sturdy Shed for Your Tools
Tired of tripping over garden tools and overflowing storage bins? A lean-to shed offers a simple, affordable, and surprisingly sturdy solution to your storage woes. This step-by-step guide empowers you to build your own, transforming a cluttered space into an organized haven. We’ll walk you through each stage, from planning and material selection to the final touches, ensuring you end up with a shed that’s both functional and aesthetically pleasing.
Planning Your Lean-To Shed
Before you grab your hammer, careful planning is essential. First, determine the shed’s location. Consider proximity to your house (for easy access), sunlight exposure (for proper ventilation), and any existing structures that might serve as a supporting wall. Next, decide on the dimensions. A smaller lean-to shed is perfect for basic storage, while a larger one offers more room for equipment and larger items. Sketch your design, noting precise measurements for the width, length, and height. Factor in the materials you’ll be using â€" pressure-treated lumber is highly recommended for its durability and weather resistance. Finally, acquire all necessary permits before starting construction â€" this prevents costly delays down the line.
Gathering Your Materials and Tools
Building your lean-to shed requires a range of materials. Your list should include: pressure-treated lumber (for the frame, roof supports, and sheathing), roofing materials (shingles, metal, or polycarbonate panels), concrete blocks or a suitable foundation base, screws, nails, a waterproof sealant, and any desired additional features like windows or doors. Don't forget the essential tools! You'll need a measuring tape, level, saw (circular saw or hand saw), drill, shovel, post hole digger (if necessary), and safety gear like work gloves and safety glasses. Investing in quality tools will make the process smoother and safer.
Constructing the Foundation and Frame
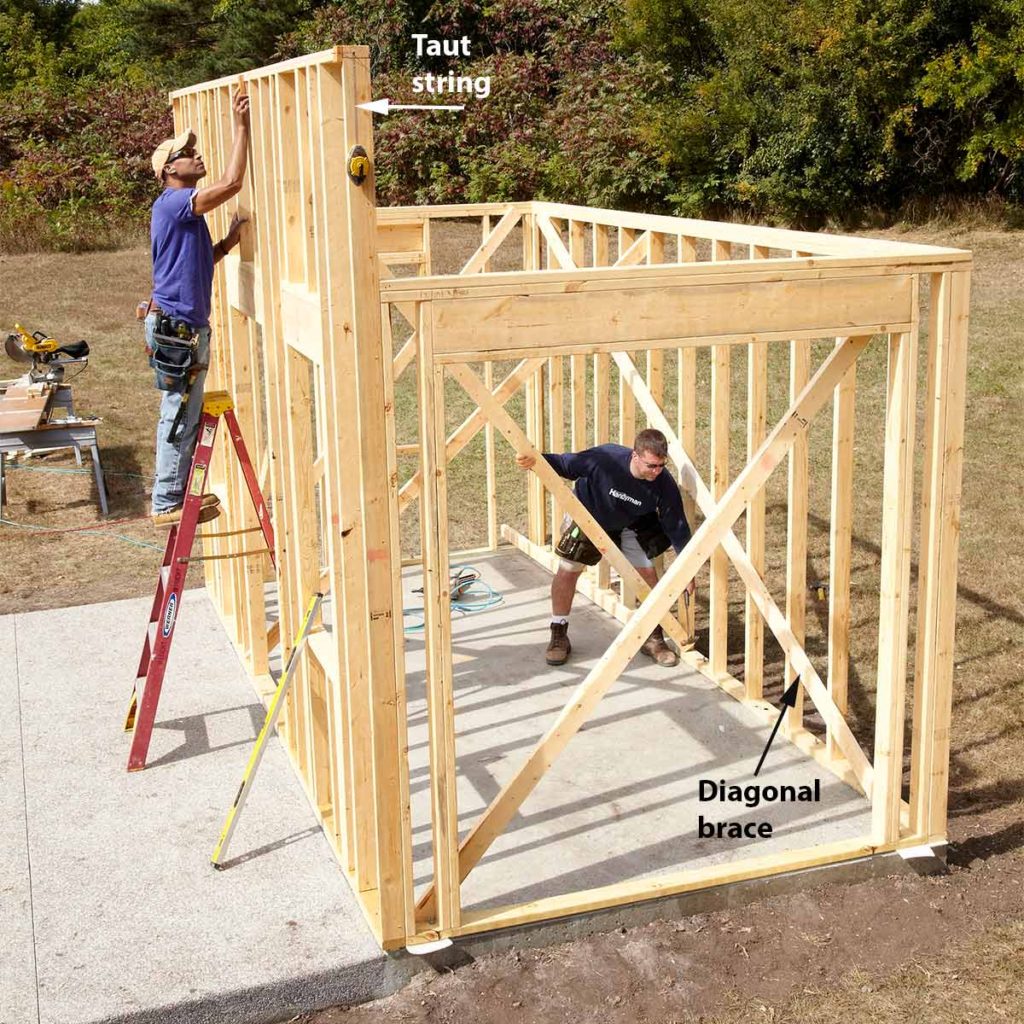
Begin by preparing a level foundation. For smaller sheds, a concrete slab or a base of compacted gravel works well. For larger structures, consider setting concrete blocks into the ground to provide a solid and even base. Next, construct the frame using your pressure-treated lumber. This typically involves erecting vertical posts against your existing structure (the supporting wall), then adding horizontal beams to create the main framework. Ensure the frame is perfectly square and plumb using a level at every stage. Precise measurements at this stage are crucial for a stable and robust shed.
Securing the Frame
Use galvanized screws or nails to firmly attach all frame members. For added strength, consider adding diagonal bracing to the frame. This helps prevent racking and warping over time, particularly important for taller or wider sheds. Remember, a strong foundation and frame are the backbone of your shed’s longevity.
Installing the Roof and Sheathing
After building the frame, attach the sheathing â€" usually plywood or OSB (oriented strand board). This creates a solid surface for the roofing material. Choose roofing that suits your budget and aesthetic preference. Asphalt shingles are a classic, affordable option, while metal roofing offers superior durability and longevity. Polycarbonate panels are a lighter alternative that allows natural light to filter through. When installing the roofing material, follow the manufacturer's instructions carefully, ensuring proper overlap and sealing to prevent leaks. Remember to wear appropriate safety gear when working at heights.
Finishing Touches and Personalization
Once the roof is complete, add finishing touches to personalize your lean-to shed. Consider adding a door for easy access, windows for natural light and ventilation, and shelving for convenient storage. Apply a waterproof sealant to all exposed wood to protect it from the elements and extend its lifespan. You could also paint or stain the shed to match your existing building or add a personal touch. A final sweep of the area removes debris, leaving your new, functional lean-to shed ready for use.
Maintenance and Care
Regular maintenance ensures your lean-to shed will serve you well for years. Inspect the structure periodically for any signs of damage, particularly after severe weather. Address any issues promptly to prevent more significant problems. Regularly clean the shed and keep it well-ventilated to prevent moisture buildup and mold growth. With proper care, your DIY lean-to shed will provide years of reliable storage.
No comments:
Post a Comment
Note: Only a member of this blog may post a comment.